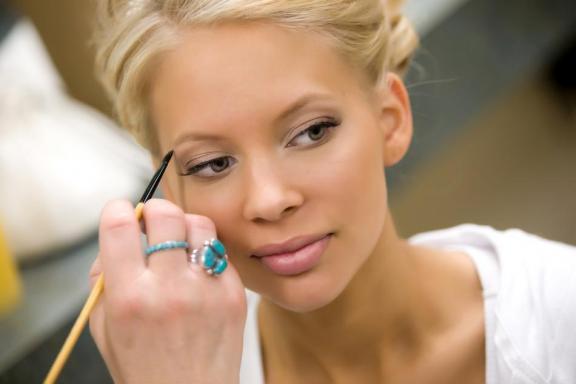
Tutorial
di base per il makeup perfetto! Le 7 fasi del trucco spiegate da Roberto
Antimi, famoso make up artist
A cura di Silvia Casini
Oggi entriamo nel meraviglioso mondo del maquillage apprendendone le regole di
base, grazie a Roberto Antimi,
famoso make up artist. Se desiderate scoprire in poche e semplici mosse
tutte le fasi per avere un trucco perfetto, prendete appunti a ogni passaggio e
avrete la possibilità di personalizzare con stile e creatività il vostro look,
aggiungendo effetti speciali e un tocco di originalità
Fase 1: la luce
Una delle condizioni fondamentali per la realizzazione del trucco è la luce,
che può essere naturale o artificiale (calda o fredda). La luce naturale è
neutra, ovvero senza dominanti. In questo caso i colori che utilizzeremo per i
nostri trucchi risulteranno fedeli, non alterati.
La luce artificiale può
avere delle dominanti, rosse, blu, arancio o gialle, a seconda della fonte di
illuminazione, che tendono a falsare i colori utilizzati per il trucco, che
potrebbero così risultare alterati alla luce diurna.
Per un trucco naturale
si consiglia l’uso della sola luce diurna diffusa, per evitare sgradevoli
ombre, mentre per un trucco da sera scegliete una luce artificiale ben
bilanciata, ovvero una buona combinazione tra luci ad incandescenza (calde) e
neon (fredde).
Fase 2: le sopracciglia
Ricordatevi che non bisogna mai depilare mai la sopracciglia prima del make up,
per non avere zone arrossate. Suddividete le sopracciglia in quattro zone:
1. la partenza o il punto d’incontro che può essere distanziato o ravvicinato;
2. il punto d’altezza che, se ravvicinato, allunga il viso, se distanziato,
allarga la parte alta del viso;
3. la coda o le estremità, corte, medie o lunghe che giocano sull’accorciamento
o l’allungamento del viso;
4. la direzione delle
estremità, che può essere dritta, leggermente ascendente (naturale) o molto
chiusa (allunga il viso).
Come correggere le sopracciglia:
• viso troppo lungo. Il punto d’altezza della sopracciglia verrà spostato verso
la parte esterna, creando una linea orizzontale che accorcia il viso;
• viso corto. Il punto d’altezza sarà posizionato un po’ verso il centro,
creando un elemento verticale che allunga
Fase 3: scegliere il fondotinta
Un buon make up comincia dal fondotinta. È sempre utile testare il colore su
fronte e collo, rispettando l’incarnato. La tabella del colore ideale è
suddivisa in cinque aree:
1. toni rosati per pelle spenta, dal colorito grigiastro;
2. toni beige per pelle chiara e pura;
3. toni albicocca per
carnagione olivastra;
4. toni avorio per pelli arrossate e rossicce;
5. toni ambrati per pelle scura e abbronzata
Fase 4: il correttore
Il correttore è un’ottima soluzione per occhiaie, acne, piccole cicatrici,
macchie, grigiore, borse evidenti e couperose. Stendetelo prima del fondotinta
avendo cura di sfumarlo bene con il pennello per far aderire meglio il prodotto
e creare un micro massaggio linfatico che attenuerà borse e occhiaie.
Nel caso della couperose
sarà sufficiente l’uso del correttore con tonalità pistacchio, poiché attenua i
rossori; per mimetizzare le macchie scure, invece, dovrete usare il correttore
giallo, che darà spiccata luminosità. Per le occhiaie meno evidenti, ma
olivastre, si può applicare un beige rosato; per quelle rosacee e violacee si
possono applicare sia i toni beige che nocciola, a seconda dell’evidenza
Fase 5: La cipria e la polvere di riso
Un consiglio su come applicarla: prendete un piumino grande o medio,
raccogliete un po’ di polvere e strofinatela sul palmo della mano prima di
picchiettarla delicatamente sul viso. Eliminate l’eccesso con un pennello
partendo sempre dal centro del viso verso l’esterno. Per ottenere un effetto
più leggero, applicate la polvere con il pennello. La polvere di riso ideale è
quella incolore, ma in specifici casi può essere necessario averne a
disposizione di colorate.
Fase 6: la terra e il phard
La terra si usa per riscaldare il viso e creare un effetto di ombreggiatura,
dando luminosità e intensità al viso. Per le pelli scure è preferibile usare i
colori mattone rossiccio, mentre per le pelli chiare occorre utilizzare delle
tonalità cappuccino. Se la terra dona ombre e intensità, il phard regala salute
e luce agli zigomi, ravvivando il volto a fine trucco. Non escludete
l’uso dei due prodotti contemporaneamente.
Fase 7: gli occhi
Se sono belli vanno assolutamente valorizzati, ma se gli occhi non sono il
punto di forza di un volto, il maquillage può fare molto per dare fascino allo
sguardo. Può rendere più grandi gli occhi piccoli; “allontanare” quelli troppo
vicini; allungare quelli troppo rotondi e così via
Toni caldi per le more,
toni freddi per le bionde, verdi e azzurri per gli occhi chiari, arancio e
lilla per quelli scuri. E poi i rossetti intensi solo per chi ha le labbra
carnose, chiari e luminosi per chi le ha sottili. Queste le regole classiche
del make up; basta, però,
dare sfogo alla nostra creatività e ci si accorge che una mora può essere
valorizzata dai toni dell'azzurro e del verde o dalla matita Kajal all’interno
degli occhi.

Basic tutorial for the perfect
makeup! The 7 steps of the trick
explained by Roberto antimicrobial, famous make up artist
Edited by Silvia Casini
Today we enter the wonderful world of make-up apprendendone the basic rules,
thanks to Roberto antimicrobial, famous make up artist. If you wish to discover in a few easy
steps and all steps to get a perfect make-up, take notes each step, and you can
customize your look, style and creativity, adding special effects and a touch
of originality
Step 1: light
A basic condition for the realization of the trick is the light, which can be
natural or artificial (hot or cold). Natural
light is neutral, ie without domination. In
this case the colors that we use for our tricks will be faithful, not altered.
Artificial light may have dominant, red, blue, orange or yellow, depending on
the source of illumination, which tend to distort the colors used for make-up,
which could then be altered to daylight.
For a natural makeup is recommended to use only the diffuse daylight, to avoid
unpleasant shadows, while for evening makeup choose a well-balanced artificial
light, which is a good combination of incandescent lights (hot) and neon
(cold).
Step 2: eyebrows
Remember that you should never ever shave the eyebrows before make up for not
having reddened areas. Break down
your eyebrows in four areas:
1. the departure or the point of
encounter that can be spaced or close;
2. the point of height that, if
close, lengthens the face, if spaced, broadens the upper part of the face;
3. the tail, or limbs, short,
medium or long playing on shortening or lengthening of the face;
4. the direction of the
extremities, which can be straight, slightly ascending (natural) or very close
(lengthens the face).
How to fix your eyebrows:
• face too long. The point of
height of the eyebrows will be moved towards the outside, creating a horizontal
line which shortens the face;
• Short face. The point of height
will be positioned a little 'towards the center, creating a vertical element
which extends
Step 3: Choose the foundation
A good makeup starts from the foundation. It
is always useful to test the color on the face and neck, respecting the
complexion. The ideal color of
the table is divided into five areas:
1. rose for dull skin tones, from
gray color;
2. beige for fair skin tones and
pure;
3. apricot shades for olive skin;
4. ivory red skin tones and
reddish;
5. amber to dark skin tones and
tanned
Step 4: The correction
The spelling is an excellent solution for dark circles, acne, small scars,
blemishes, dullness, evident bags and rosacea. Lay it before the foundation taking
care of blending it well with a brush to adhere better to the product and
create a micro-lymphatic massage that will alleviate dark circles and
puffiness.
In the case of rosacea is simply the use of concealer shades with pistachios,
as reduces the redness, dark spots for camouflage, however, you should consider
using the yellow, which will give very airy. For
dark circles less obvious, but Olivastre, you can apply a pink beige; those
pinkish purple and can be applied beige and brown tones, depending on the
evidence
Step 5: The powder and rice powder
A tip on how to apply it: take a large or medium jacket, pick up a little 'dust
and rub it on the palm of your hand before you tap it gently on the face. Eliminated the excess with a brush
always starting from the center of the face outwards. To get a lighter effect, apply the
powder with the brush. The rice
powder is ideal colorless solution, but in specific cases may be necessary to
have available to colored.
Step 6: land and phard
The land is used to heat the face and create a shadow effect, giving brightness
and intensity to the face. For
darker skin are preferred brick reddish color, while for light skin tones
should use the cappuccino. If the
earth gives shade and intensity, phard health and gives light to the
cheekbones, fanning her face at the end of makeup. Do not exclude the use of the two
products simultaneously.
Step 7: eyes
If you are absolutely beautiful to be valued, but if the eyes are not the
strong point of a face, make-up can do much to give charm to the eye. It can make small eyes bigger,
"remove" those too close; stretch those too round, and so on
Warm tones for blackberry, cool shades for blondes, green and blue for blue
eyes, orange and lilac to dark ones. And
then the intense lipstick only for those with full lips, clear and bright for
those who have thin. These
classic rules of make up; enough, however, give rein to our creativity and we
notice that a default may be set off by tones of blue and green or Kajal pencil
inside the eye.